Most Blogger templates have a list of variables in the beginning of the HTML that specify font size and font color for the various portions of text on the blog; e.g. post body, sidebar, footer.
However, if an element doesn't have a direct specification - it just defaults to the blog font color and some percentage of the blog text. In this case, the changes you try to make on the Layout window (Fonts and Colors) just don't work.
I had a template that I wanted to customize the font-size and font color of the links on the sidebar (labels and post titles from a feed). Since there was no specification for sidebar links, I created some.
I've used this code on several templates, including Minima and Thisaway. It should work on most modern templates.
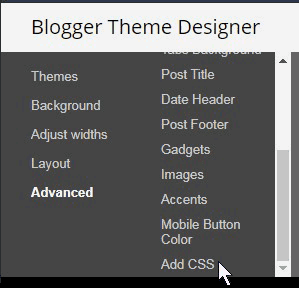
Copy and paste this code at the beginning of your HTML where the other CSS styling elements are. Don't forget to make a backup of your blog template first!
- #sidebar li a:link {color:#003399;text-decoration:none;}
- #sidebar li a:visited {color:#66CC66;text-decoration:none;}
- #sidebar li a:hover {color:#cc0000;background-color:#FFFF99;text-decoration:underline;}
- #sidebar li a:active {color:#FFFFFF;text-decoration:none;}
Let’s discuss the CSS styling for links. First of all, the link states
must be in this particular order (link, visited, hover, and active). Here are their definitions.
- a:link - the color of the link when the blog first opens; an un-visited link
- a:visited - the color of the link after the link has been clicked on and the post viewed
- a:hover - the color that displays when the mouse cursor hovers over the link
- a:active - the color of the link at the very moment that it is clicked
If you don’t know CSS, here is an explanation of the code above.
- color:#000000; - the 6-digit hexadecimal code representing the font color. See * below.
- background-color:#000000; - the background color behind the link.
- text-decoration:none; - usually links are underlined in text, but not on the sidebar. However, links look nice underlined in the hover state.
* There are many websites that provide the 6-digit hexadecimal codes for the over 200 colors in the web-safe color palette. If you would like to see some additional color codes, see our blogs:
Cheers!
► Take a look at some of our other interesting posts, such as How to Remove Label From Displaying Below Posts
If this post has been helpful, please consider linking to our blog or sharing!